As many of us have, or will transition to Scrivener 3, I was reminded today that not everyone has done so quite yet. So, if you ever need to work on, or share a project with someone that requires Scrivener 2, it might be handy to know how that you can export the project in the Scrivener 2 format.
Simple process:
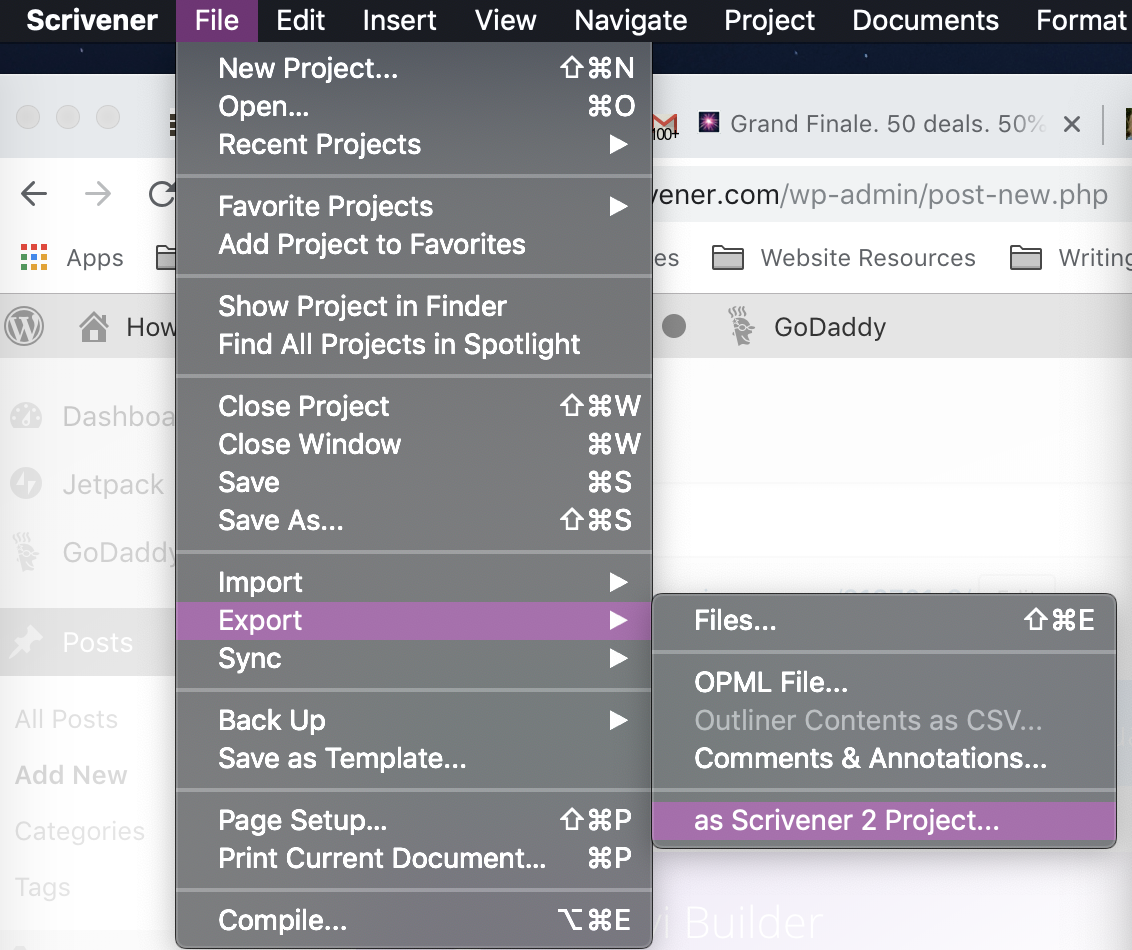
1. Open your Scrivener 3 project on your mac, and on the top bar you can navigate to File—>Export—>as Scrivener 2 Project.
2. Pick a name and location for your Scrivener file, and merely click Export. Because, by definition, you’re using a Scrivener 3 file to get to a Scrivener 2 file, you’ll probably want to name your exported Scrivener 2 file something that won’t cause you to criss cross the two files in the future. I recently did this, and added “Scriv2” in the name so that I wouldn’t confuse it with the original Scrivener 3 file name. Just a thought.
3. Screenshot: