The Scrivener Outliner – Do I Have to?
Outlinining with Scrivener is easier than you probably think. Whether you’re an Outliner or a Pantser, Planner or a Gardner—however you choose to word it—most would agree that there’s a place for some level of organization in your writing, and Scrivener allows you to go as deep and broad as you’re willing to go. Do you have to? No, of course not, but it should be something you explore, shouldn’t it? We’ve already covered the corkboard on howtoscrivener.com, and today we’ll cover the outliner—the wicked outlining tool that Scrivener provides us.
The Outliner and The Corkboard are Connected
The first thing to understand is that the scrivener corkboard and outliner pull their information from the same files—those documents you create, write on, and move around. So, it behooves you to add all the keyword, metadata, and inspector information you can add to each of those documents. Doing so will pay off nicely as you use Scrivener more in depth.
Why, in this case? Because as you change your views of those documents, Scrivener presents that information to you in interesting ways that will facilitate your creative flow, and help you get more work done. So, for this example, the outliner and the corkboard are just different views of the same documents and information.
Activating the Outliner
First off, select the folder that represents your entire novel in the binder to the left. I assume this is the view most writers would want to 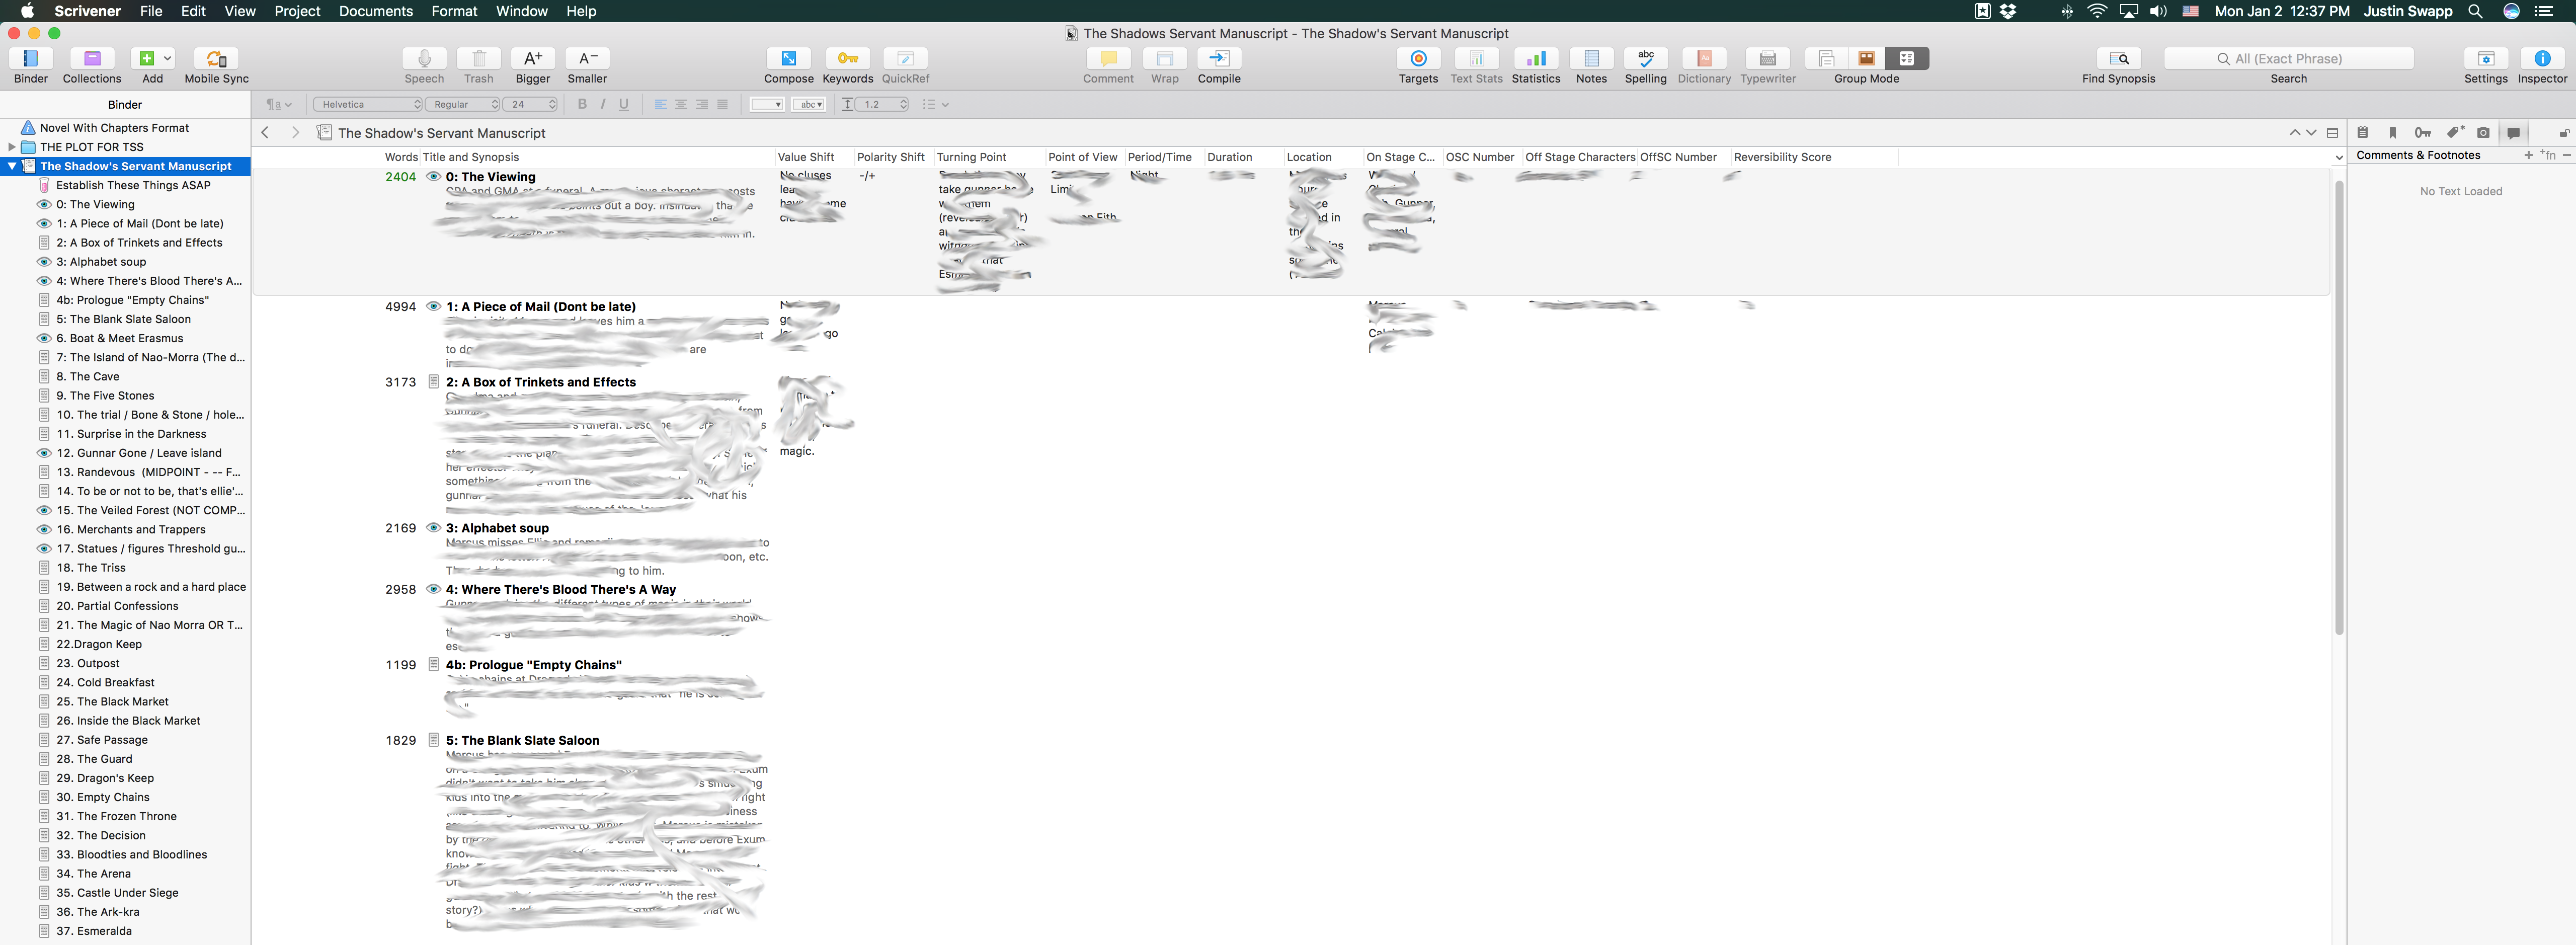 view. Whatever you click on in your binder will determine what you see in the editor (main window.) Unless you’ve customized the outliner already, you’ll start with a simple, single column outline layout that shows the title of your documents, and any synopsis you’ve given them. Note: Again, this should mirror what you’ve written in your documents, and what shows up in the corkboard. If you’re worried that the outline view is too simple, don’t be. The outliner is actually highly customizable.
To turn on the Outliner:
- Click on the Outline icon in the main toolbar (it’s next to the corkboard icon)
- Or, alternatively, click on View -> Outline from the menu options above the toolbar
What the Outliner can Do
With your novel selected in the binder, you should see your documents, synopsis, titles and other information (if previously configured) in the editor. So now that question becomes, what can I do with this view?
- You can sort the columns by clicking on the header of the column. Multiple clicks will toggle the column sorting from ascending to descending order, and back and forth. Note: Sorting the columns in the editor should have no effect on your writing / organization in the binder.
- You can add columns by clicking on the gear icon in the upper right-hand corner of the toolbar (the button left of the inspector button.) This will bring up the meta-data settings. There is a plus button at the bottom left of the pop-up. By clicking on that, you can add and name your own columns.

- Should you chose to, you can also drag and drop your files (scenes/chapters/documents) inside the editor and rearrange them. Doing this WILL change your documents in the binder.
- In the bottom left-hand corner of the editor, you’ll find small icons that let you add a document, or add a folder. There is also a little gear icon that lets you get into the settings. There you can add a label, or a status to one of your documents, among other things.
- You can hide the synopses for your documents by clicking on the “Hide Synopses” button in the lower right-hand corner of the editor. If you have a lot of chapters, or subfolders in your project, this will collapse the extra detail, and let you fit more of your titles/documents on the screen.
All of that sounds simple enough, right? The real fun begins when you add columns to the Outliner and start playing with the meta-data. Check out part two of this article, which goes into configuring Scrivener’s custom meta-data.
