One the features Scrivener is most known for is its templates, and while Scrivener comes with several templates pre-loaded, perhaps you want to create a custom one yourself, or use one you have downloaded. Either way, they can save you a lot of time, especially if you work on similar projects frequently. As a novelist, or a blogger, this can be a real boon. Best of all, anyone can create a Scrivener template and share it for others to use!
Importing a Scrivener Template
While using Scrivener templates is easy, it’s not as simple as just double clicking on the template file (perhaps that will be addressed when Scrivener 3 comes out later this year). In order for you to use a Scrivener template, you actually have to import the file. Fortunately, this isn’t hard at all.
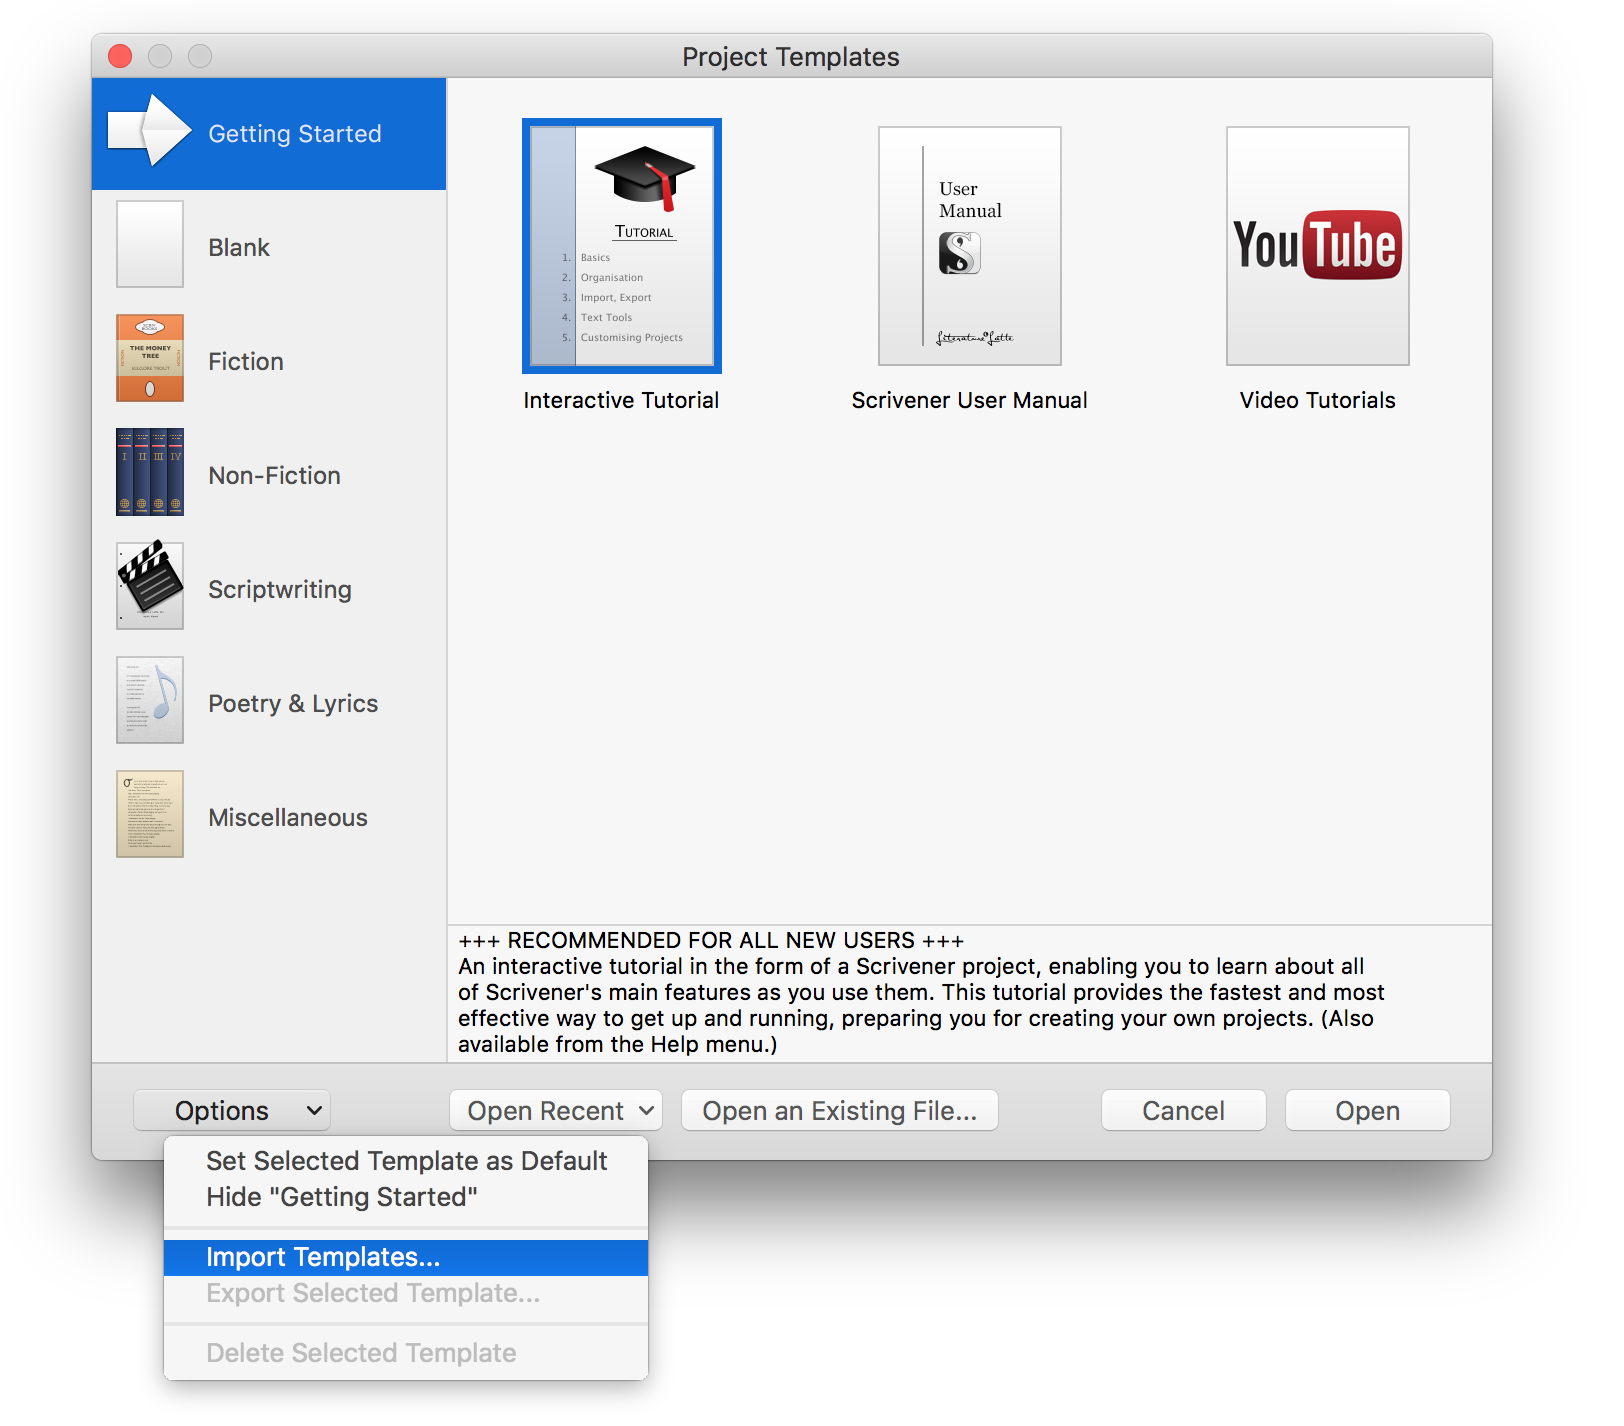
Simply launch Scrivener, and you’ll see the splash window below that lets you start a new project by selecting one of the templates that come pre-loaded (or that you have already imported) into Scrivener.
If you don’t see the splash screen below, and Scrivener loads your most recent project automatically, simply click on FILE -> NEW PROJECT and it will launch the splash screen mentioned previously. It looks like this:
Importing a template from here is a breeze. Notice the button on the bottom of the window called OPTIONS. If you click on that, you’ll see a drop-down appear with the option to select IMPORT TEMPLATES.
It’s as simple as clicking on that. Now, navigate to the template file on your computer. Your template will import into your instance of Scrivener, and you will subsequently find it in the list of templates for a new project next time.
Happy writing!


