Start A New Project in Scrivener
To start a new project in Scrivener, you’ll need to have downloaded a trial here, or purchased the software here. This tutorial assumes you have an installed copy of Scrivener on your computer, and that you are ready to launch the application.
Launching Scrivener
The first step to get your project going is to launch scrivener. You might have an icon on your desktop, or one that you placed in your dock (Mac) or start bar (windows). In either case, the icon will look like the one in the one here.
Once you find your Scrivener icon, click on it, and launch the software. Once the software loads, you’ll see the Scrivener splash screen, which is a launch pad, if you will. From here you can choose what you want to do in Scrivener for your session. So, you can choose to open a template that came with the application, for example, or load an existing file of yours.
The Scrivener Splash Screen
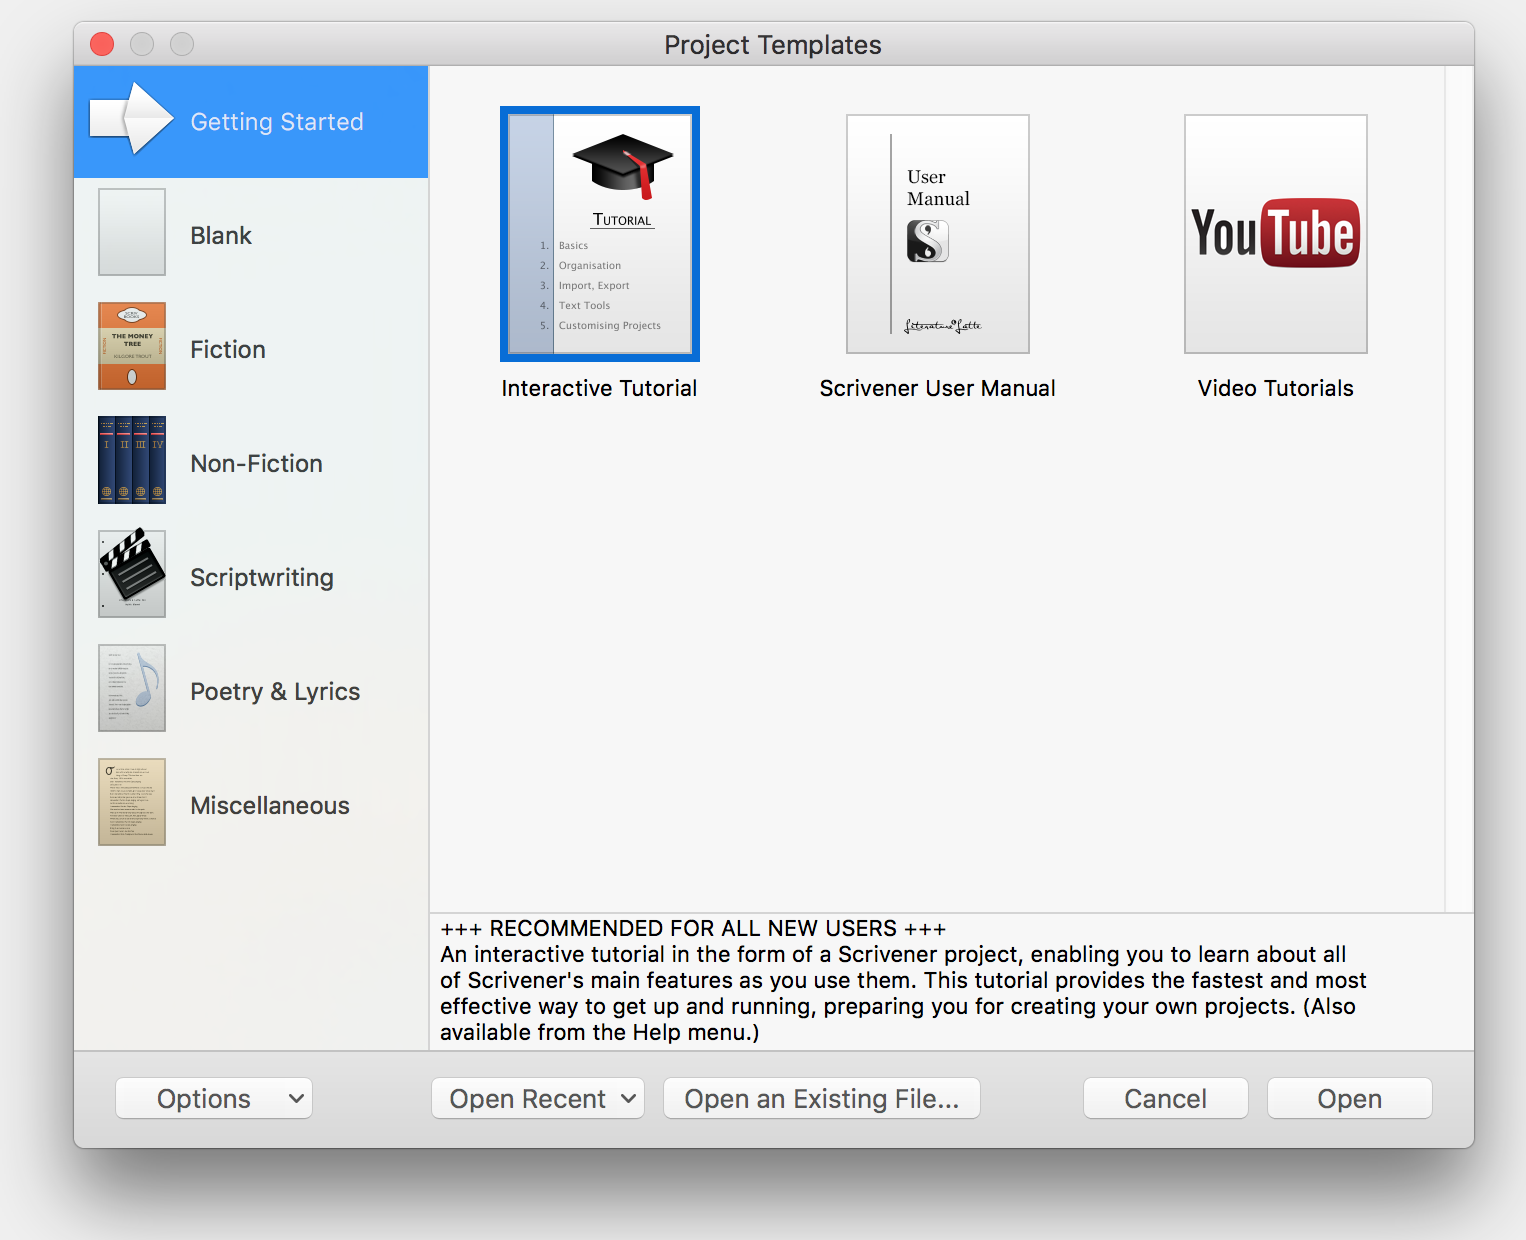
The Scrivener splash screen looks like this (Mac version shown:) Again, consider this your launch pad.
The layout really has three parts:
- A vertical bar for templates on the left. This is the “getting started” section. It contains various templates you can choose to load for your Scrivener session.
- The window to the right of the “getting started” section is the largest part of the splash screen and shows the contents (templates) contained in whatever you selected in the “getting started” bar on the left. There is also a block of text underneath this portion of the window that shows the description of whatever template you click on.
- Finally, an option bar sits underneath it all, at the bottom of the window. There are options for importing/exporting files, as well as opening recent and existing files,
Choosing a Template or a New Scrivener File
Your first decision is whether or not you want to start from scratch, with a “Blank” scrivener file, or to leverage a Scrivener template. Don’t let this decision stress you out. One of Scrivener’s strengths is its flexibility. So, regardless of how you want to approach your scrivener session, what decision you make, you always have the ability to organize your writing however you want. That said, let’s break this down a little bit.
Starting With a Blank Scrivener File
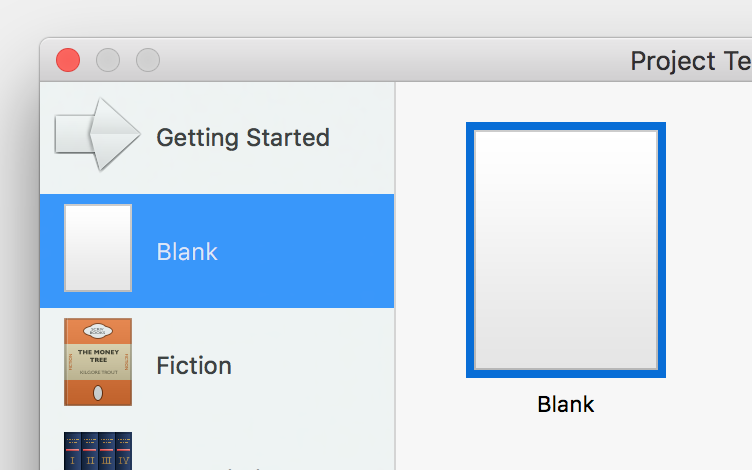
If you want to start from scratch with Scrivener, no problem. All you need to do is select “Blank” from the “getting started” section. Once you do, you’ll see a graphic for a “Blank” document appear in the window on the right. Just select that by double clicking, or selecting the “choose” option.
A window will pop up prompting you to name the blank file you’re about to create. You’ll want to give your new file a name (it defaults to Untitiled.scriv,) and tell your computer where to store the file (It defaults to your “documents” folder.)
Starting With a Scrivener Template
If you want to start your Scrivener session with a template, the process is exactly the same, except you’ll want to decide what template you’d like to start with. Scrivener starts with a slew of templates to choose from, spanning fiction and non-fiction, screen writing, and others. If you have imported any Scrivener templates, they will be displayed here along with the others.
Choose the template you’d like to load, and either double click on it, or click on the “choose” button. For the sake of this tutorial, we’ll just go with the “Blank” document template.
The Final Product
Here’s what you’ll get when you follow the instructions above. In effect, you’ve created a blank document with minimal structure applied to it. But, what exactly do you have here?
- There’s a toolbar at the top to give you shortcuts to various Scrivener functions.
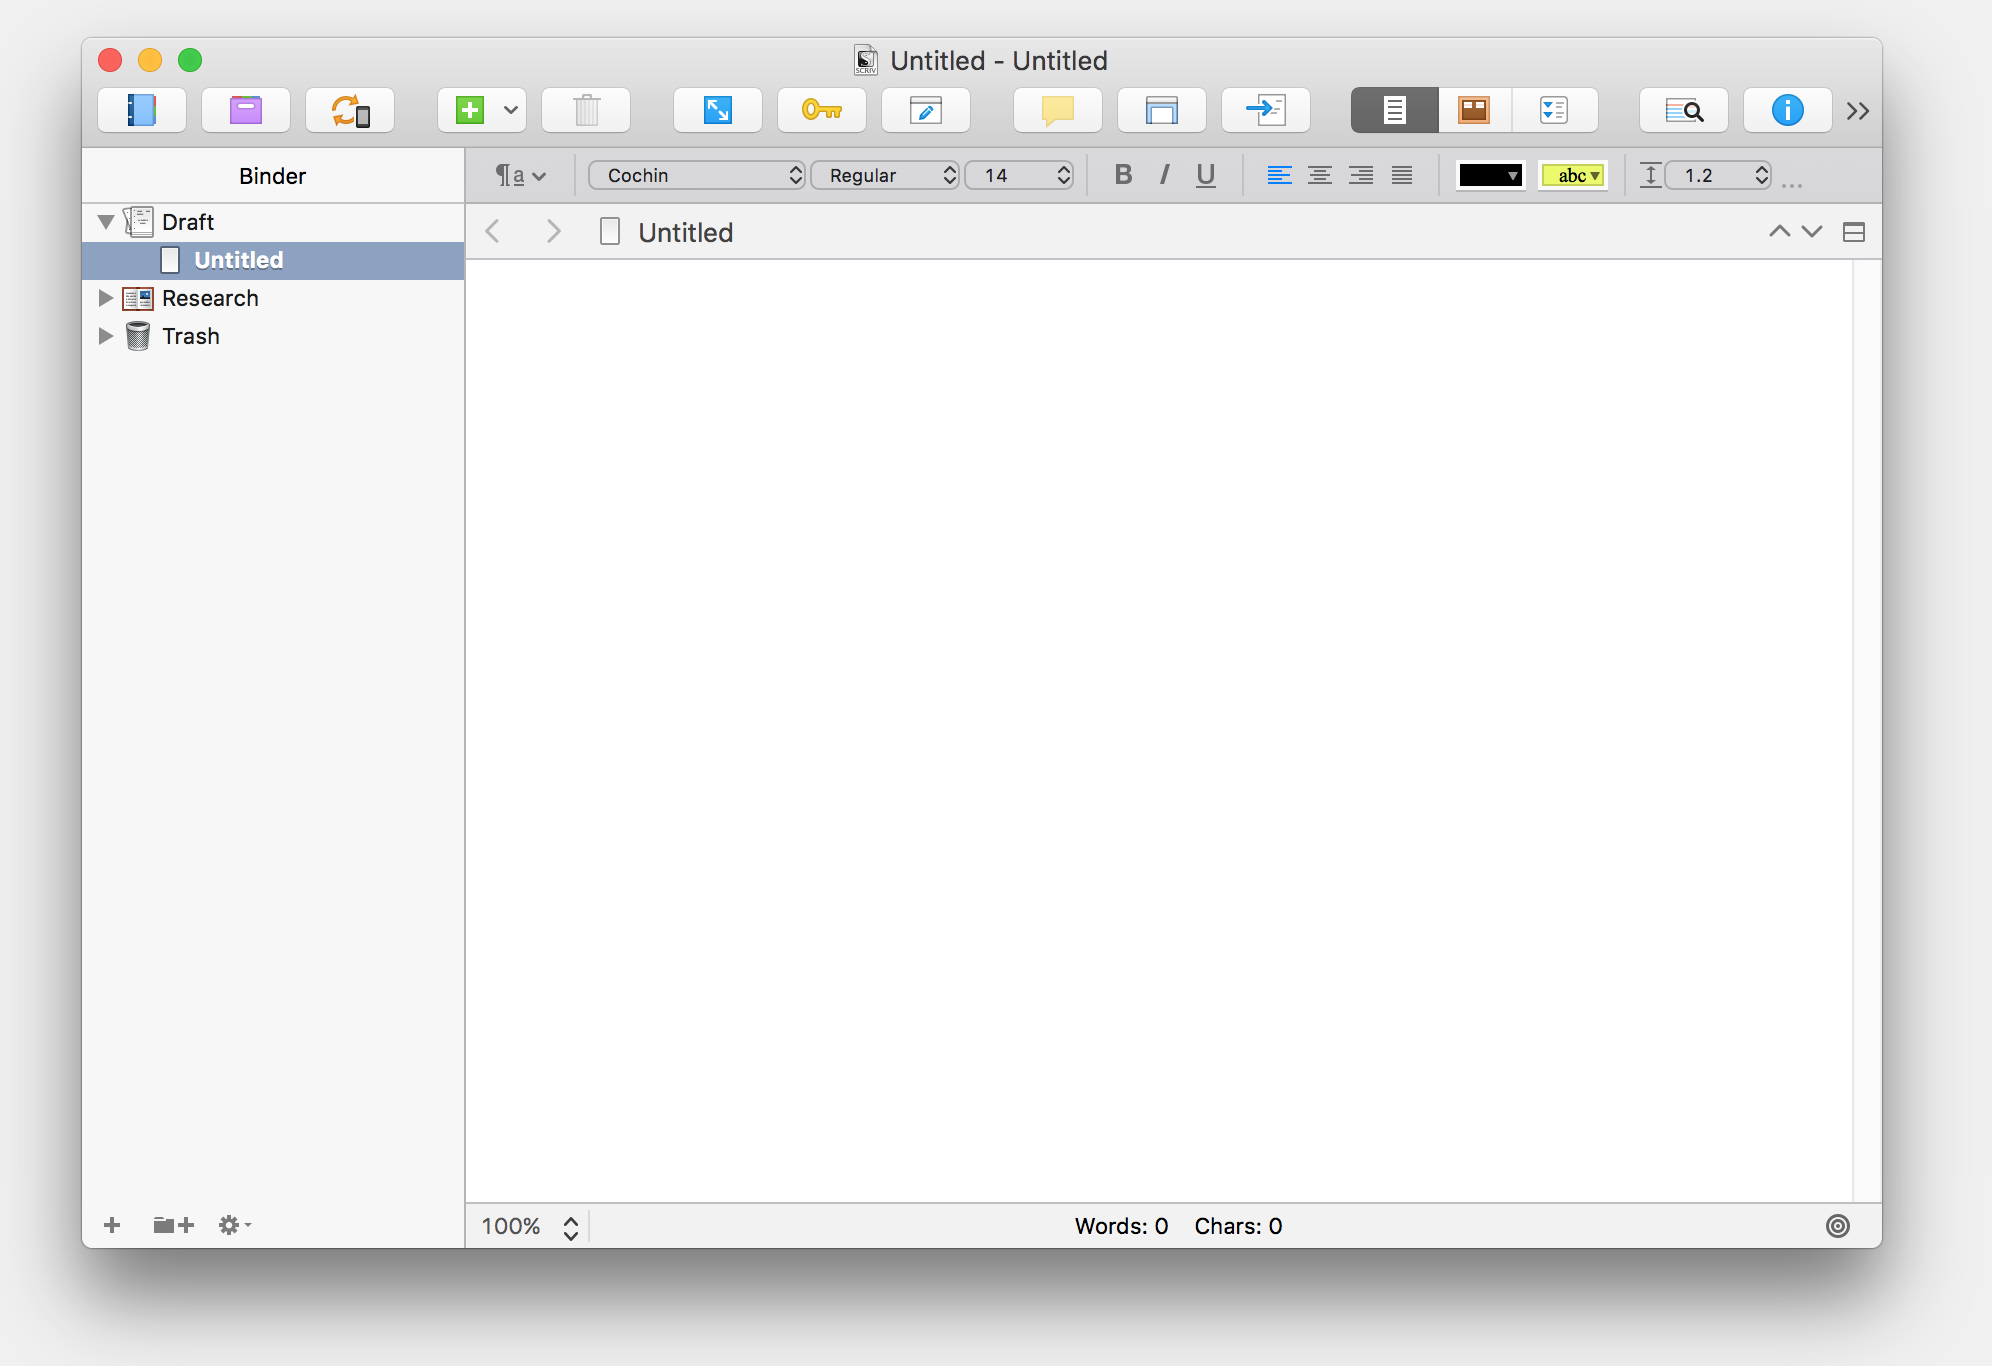
- Scrivener’s binder bar lives on the left of the document. This is where you organize your chunks of writing and text.
- You have a nice, crisp blank document area on the right, ready for your muddy little writer hands to type all over.
- At the bottom of all the windows rests various buttons, like creating new folders, and visual indicators about your writing, like word count, among other things.
And that’s all there is to creating a new document in Scrivener. Check out my future posts for additional details and deep dives into the vast feature set Scrivener offers.
