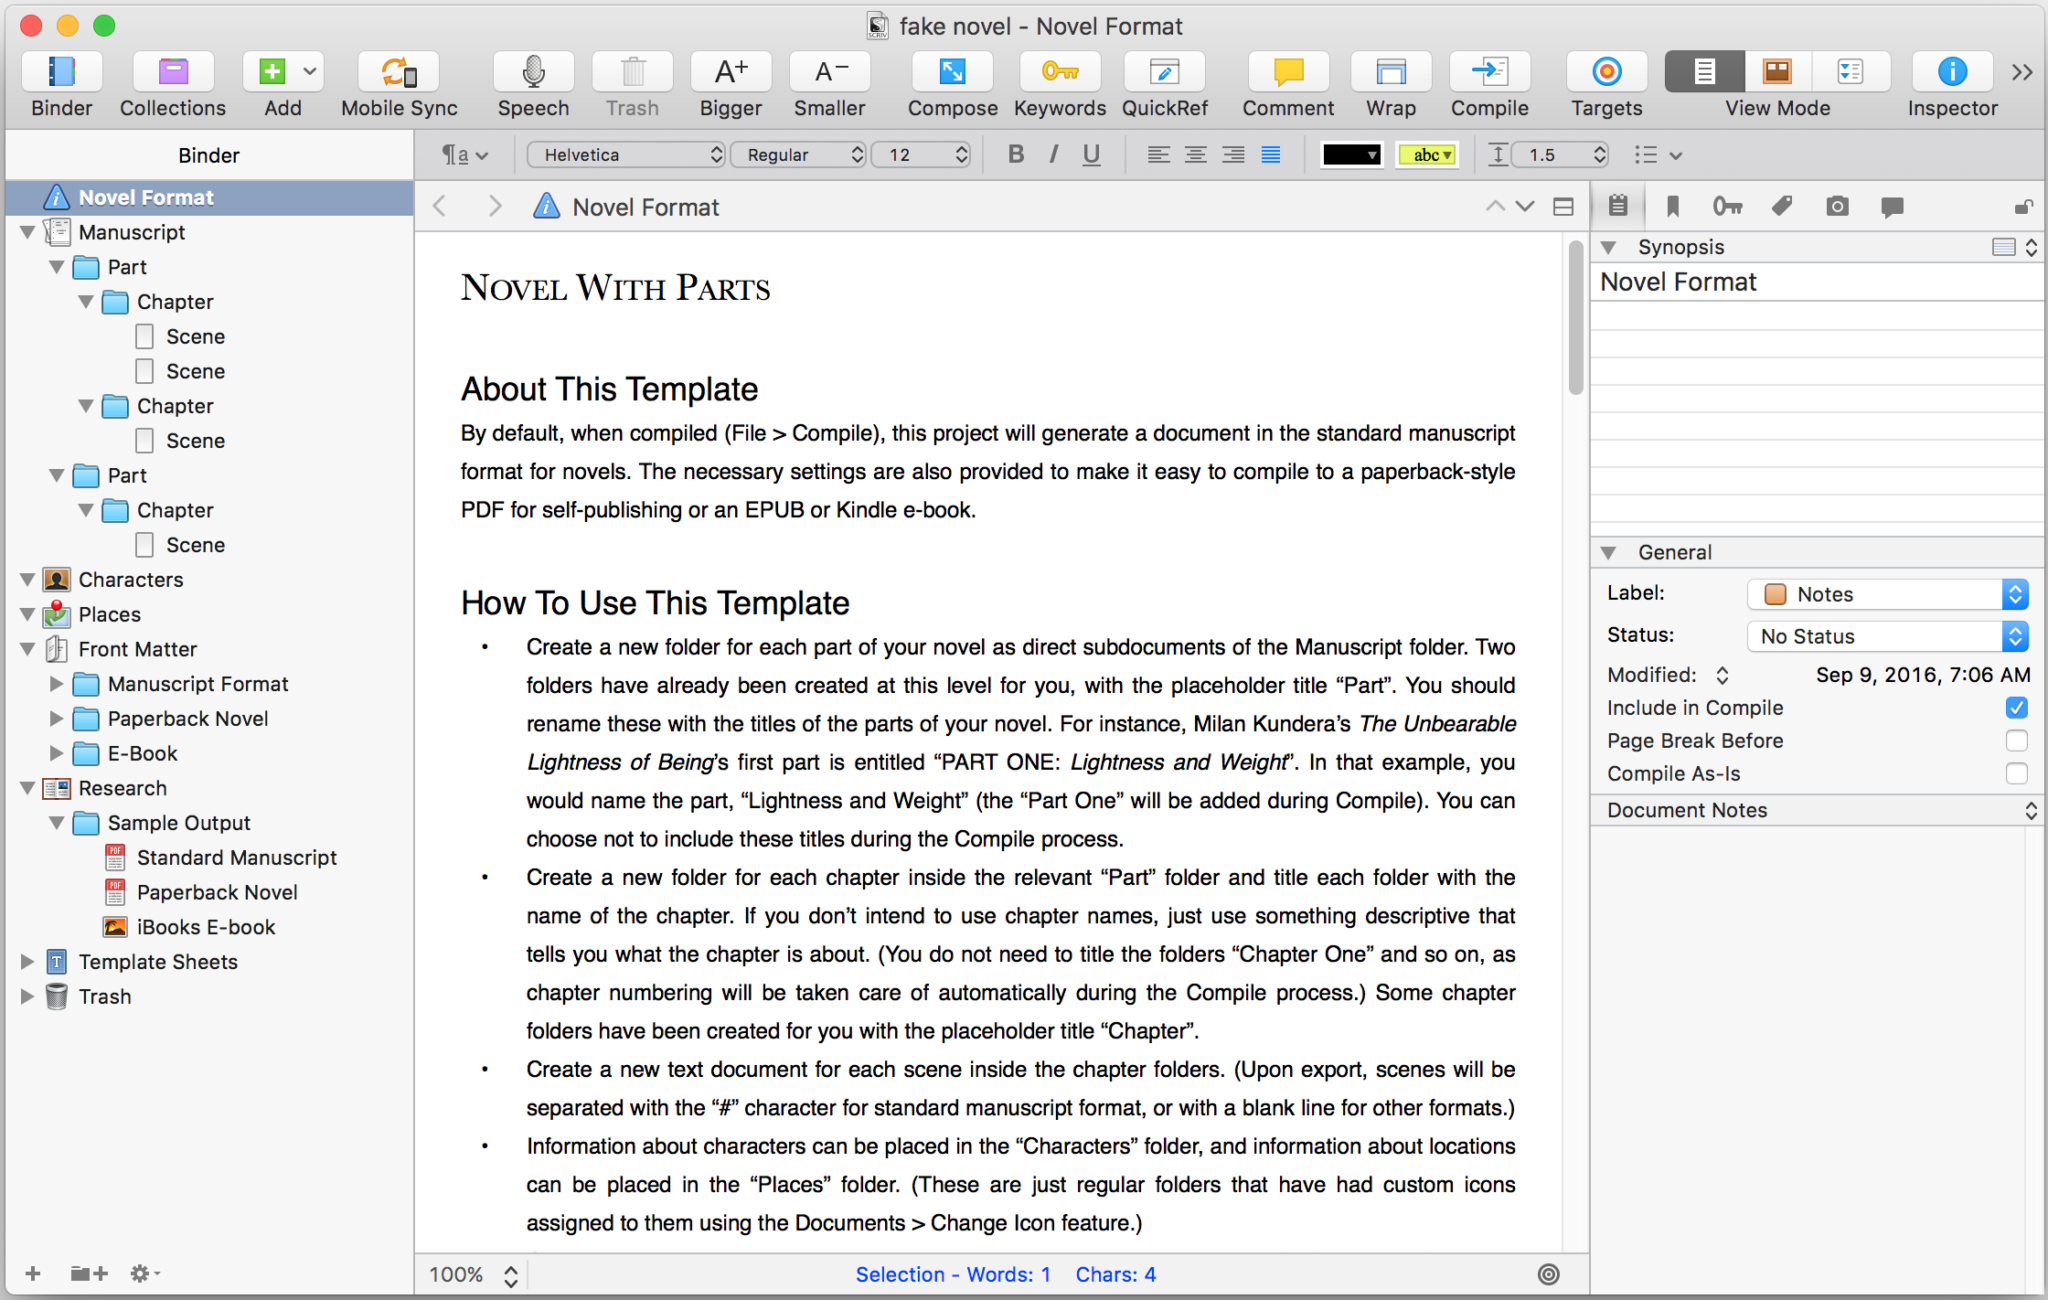
Click here to see a larger version of the Scrivener Binder
How to Use Scrivener’s Binder
The Scrivener Binder is a powerful scrivener feature designed to give the writer ultimate flexibility and control over the organization of his writing. If you’ve ever been frustrated with Microsoft Word because, for example, you have to navigate one long block of text in one document, or try to find something specific across several separate files, fear no more! Scrivener makes all that go away in a snap—with the binder.
The Scrivener Binder
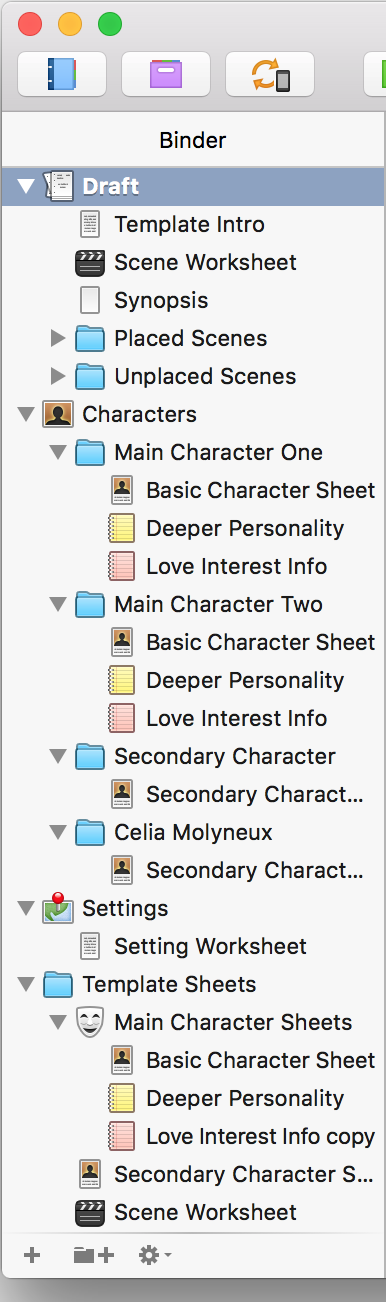
A different style and hierarchy are applied in this binder because of the template I applied.
Scrivener’s binder is the structured list of all the files and folders in your project file. In other words, hierarchy. The binder is where you organize all your writing. This means the content in your Scrivener project, like documents, as well as the style with which you organize it all is within your control. Scrivener allows you to ask yourself how you want to organize your writing workflow and archives.
Depending on whether or not you started with a blank scrivener file, or a template, the style, and organization of your binder will reflect that. In the screenshot on the left, for example, we see the Pen and Muse Fiction template. They organized the folders, and the documents, and the icons, and the order of them all in a way that suited their needs—their workflow. You’ll notice that the binder in the screenshot in the upper right of this post looks completely different, and is also organized distinctly.
Binder Elements
In the binder, you will find various elements and functions to help you organize your writing. These range from hierarchical elements that literally let you organize your files and folders, to stylistic icons and other indicators that help you distinguish and your elements from each other.
There are several methods for activating these elements. You can click on the appropriate icon in the toolbar at the top of the Scrivener interface to add a document, or a folder, for example. But you can also right-click the binder and add documents and folders that way, too. There are also keyboard shortcuts that will do the same.
Here is a list of the major binder elements and their definitions.
- Collections—Scrivener collections let you keep a series of documents in your Scrivener project in one organized place. These are different from folders. You could consider them as saved searches that live inside the binder with their own view.
- Text files—The documents you create in Scrivener.
- Folders/Sub-Folders—A hierarchical element that lets you organize text files by whatever folder structure you choose to use. Similar to the folders on your computer’s desktop, and can be viewed like in Windows Explorer, or your Mac’s Finder.
- Trash—A place where your documents go to die until you raise them from the dead.
These are the basic hierarchical elements of Scrivener’s binder. That said, there are other attributes that you can apply to the binder elements that make organizing your content and workflow that much easier. Many of these stylistic features are accessed by right clicking on the folder, or on the document element and choosing how to style or status that element.
Style Elements
- Icons—Adding colorful or distinctive icons to your documents and folders allow you to find what you’re looking for at a glance.
- Labels—Scrivener lets you create your own labels. If you’re a novelist, you might want to label something a scene, or a chapter. If you’re a blogger, you might label something a “post,” or your labels might revolve around your blogging schedule, like “June, 2016.”
- Status—At first glance, this might seem just like a label, but they are different. Status is workflow related, whereas labels are just monikers to help you create order in your hierarchy.
- Color—You can control the color of your binder, the windows, and other elements of the interface. Some people go crazy with this, but hey, it’s your constitutional right, no? If you go to tools—> Options —> Appearance you can lose your mind if you want to.
Outside of the above, there are other nifty features in the binder, such as:
- Drag and Drop—You can move documents in and out of folders, and folders in and out of folders, too.
- Keyboard Shortcuts—There are many Scrivener shortcuts. I’ll probably do a blog post on these, but for now, here’s a link to some here and here.
There’s a whole lot more to cover, but those are the basics. Happy writing!