
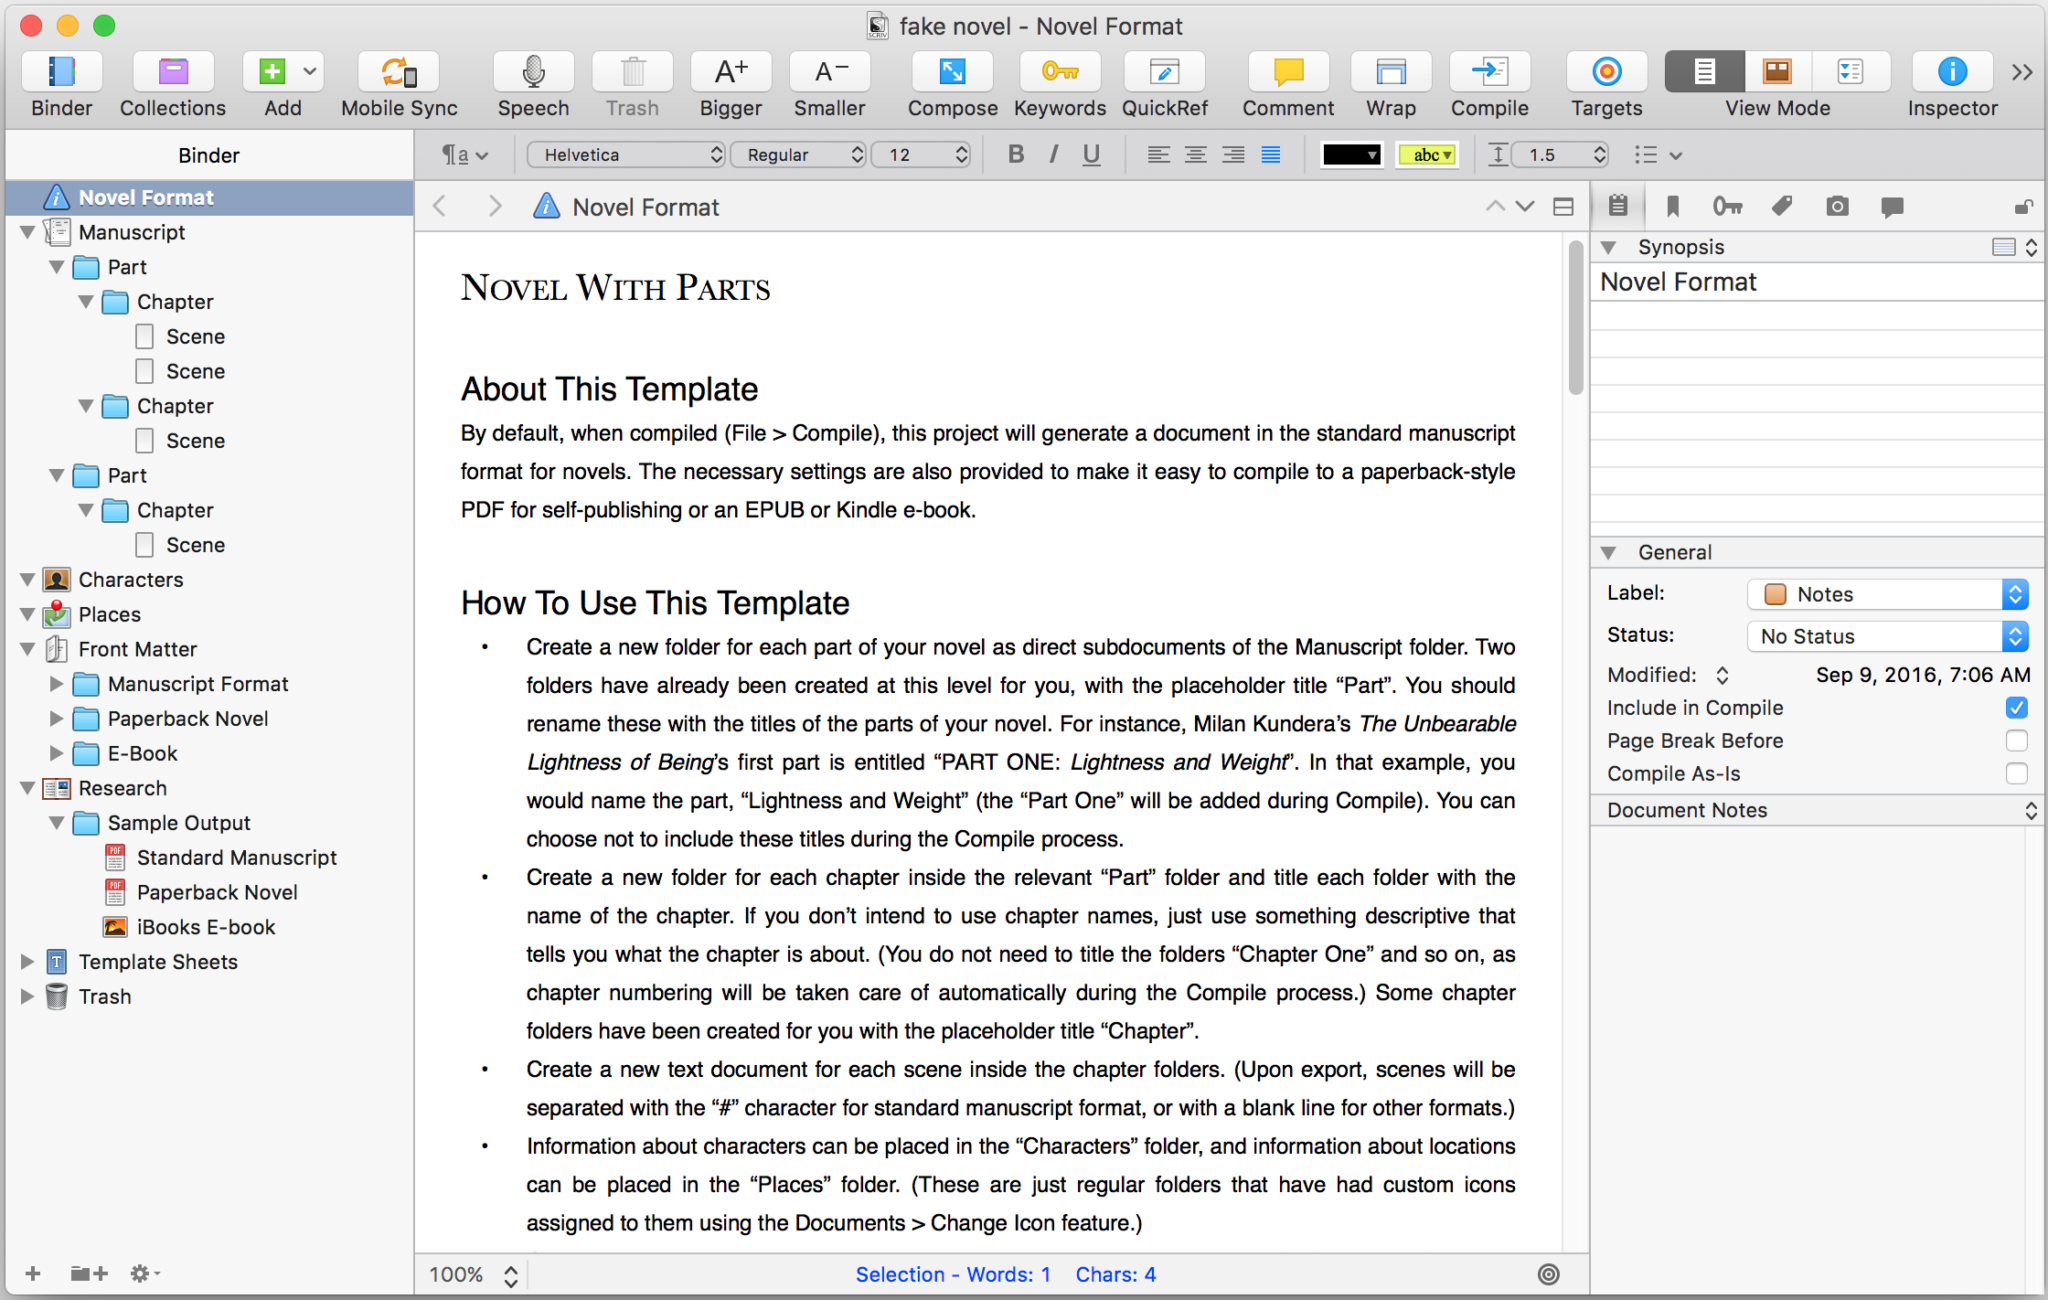
Click here to see a larger version of the Scrivener Binder
Scrivener gives you various ways to organize your documents into one project, and some special tools to improve your ability to get around your writing. One way Scrivener gives you additional organizing flexibility is with the collections feature.
Scrivener Collections
Scrivener collections are essentially associations you tell Scrivener to make regarding the different documents in your Scrivener file across the different parts of  your project. There are several types of collections in Scrivener—standard, and search collections. In spirit, this is similar to how a hashtag on twitter will bring tweets together around a common theme (will link various tweets together that have all used the same #hashtag,) only executed differently. The good news is that you choose the relationship – it might be based on search criteria, a document status, or even something that only holds meaning for you.
Standard Collections
To create a standard collection, all you do is click on the collections folder icon (shown above) on the toolbar and Scrivener will expose a collections layer on the sidebar (shown to the right.) Click the plus button next to the word “Collections” and give it a name. . ) Then, to 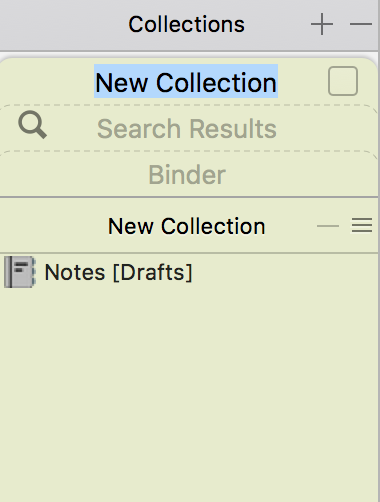 create your collection, all you need to do is drag and drop documents from your binder, into the collect to associate them together. You can also hold down CTRL (PC) or COMMAND (MAC) to select multiple files before you drag and drop—this so you don’t have to do them one by one.
Search Collections
Search collections are basically saved searches across your project that you can run and re-run once you have gone through the initial setup of the search. Again, you decide what this is. So, the possibilities for how this positively impacts your writing workflow are vast.
To do a search you simply you go Edit—> Find—> Project Search and search for a phrase or a term that you’re interested in searching for now, and potentially in the future. Also, you can just type into the search bar in Scrivener’s main toolbar. In the screenshot below, I used the search term “Character” in the screen shot below.
Once you have completed your search, you can click on the search and drop-down icon next to your search term. When you do so, a 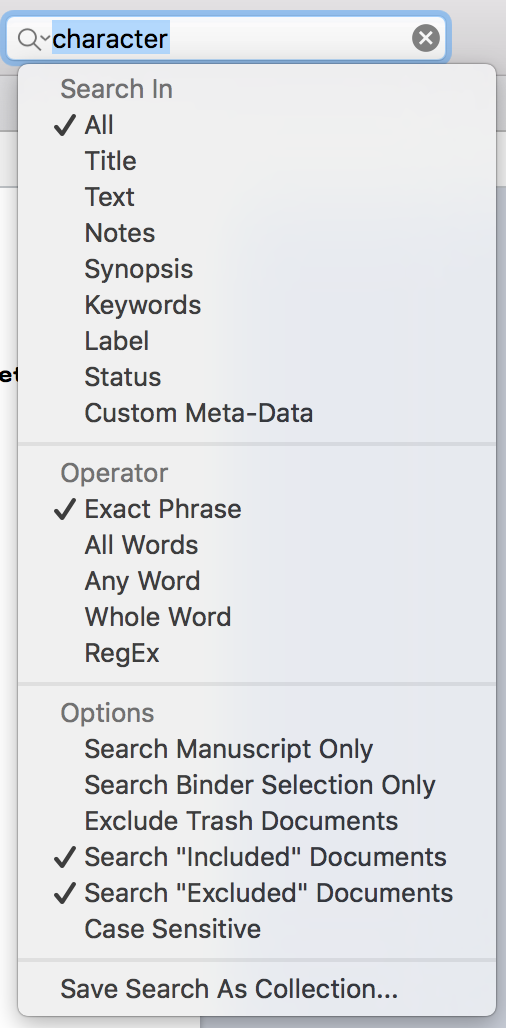 drop-down menu appears with a list of options for you to choose from to control the parameters of your search (“Search In,” “Operator,” and “Options.”) You’ll want to select the factors you want to be considered in the search. For example, the “Search In” portion of the drop-down menu lets you specify WHERE you want the Scrivener to look for your search term. The “Operator” section lets you select how narrow or broad you want the search to be (the specificity of the search term and the text you’re comparing it to.) The “Options” portion of the menu lets you decided how to apply your search at the document level.
Once you’re satisfied with your search term, and your search criteria, you can select the option “Save Search as Collection…” to create the saved collection. At this point, the saved search (collection) will appear in the collections portion of the sidebar. And there you have it, your shiney new scrivener collection. 🙂